
You bought a wood cutting board. Congrats! Wood is arguably the best material for cutting boards as it is easy on knives, keeps plastic bits out of your food (sorry plastic cutting boards) and is easy to upkeep. Just because it’s easy however, doesn’t mean that nothing needs to be done. Over time, finishes fade away and will need to be reapplied. Most wood cutting boards are finished with one of two things: mineral oil or beeswax. This article will be covering mineral oil specifically, we will cover beeswax at a later date.
Before we hop into reapplying finish, you may be interested in scrolling down a little bit first if you have knife marks on your board. Down below, we cover how to take care of them. They are best dealt with first, before reapplying finish.
Mineral oil is my preferred finish for boards, and it is exclusively what I use. Mineral oil is absorbed by the board, which keeps it from drying out. This also prevents the board from absorbing significant amounts of liquid from whatever you may be cutting on it. Mineral oil will have to be reapplied from time to time as it does eventually dry out. You can tell when it is time for some mineral oil as the board will fade in colour. Most people can expect this to happen 2-3 times a year. Fear not! The reapplication process is simple! First step is to acquire some paper towel (or a cloth) for application and the mineral oil. Here are some links to some that I have used and liked in the past:
One Gallon Container (Buy this and you’ll likely be set for life): https://amzn.to/4dC716u
A Smaller Container (If you want to experiment with finishes, this is the better way to go): https://amzn.to/4rNNjrO
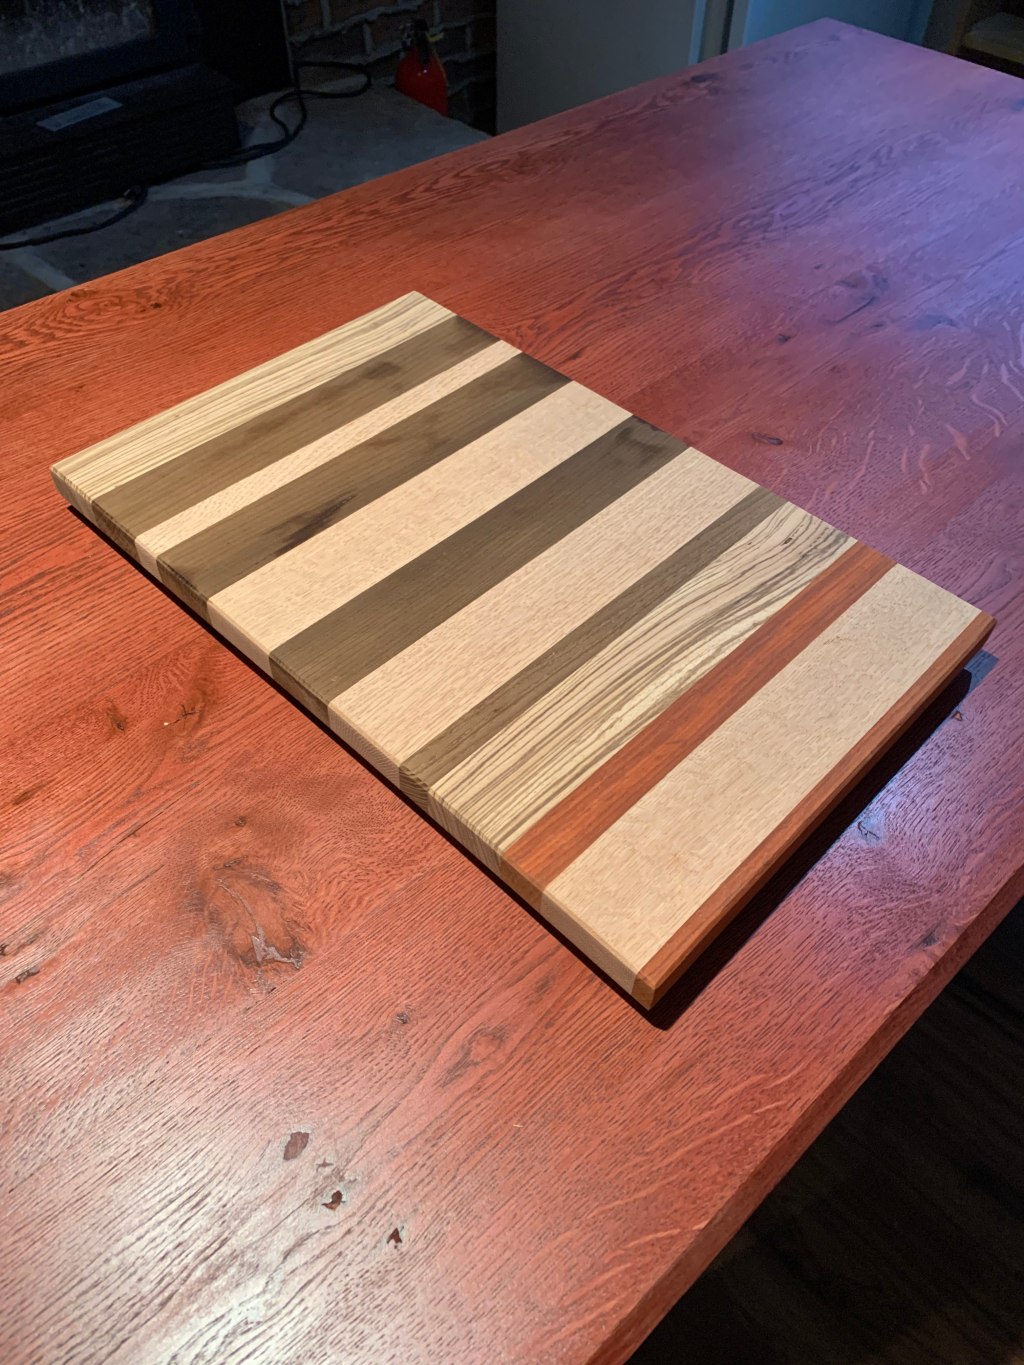
Alrighty, now that we’ve sourced some mineral oil, it’s time for Step Two: Application. Pour a small amount of oil onto the board, a puddle about 1/8 the size of the board is a good starting point. Spread it with the cloth or paper towel that you chose and watch as the wood darkens with the moisture of the oil. That’s one of the great things about mineral oil; it is simple to see where you’ve already applied it. As you continue to spread it, make sure you get all the edges as well. You will find that the end grain portions of the board (the places where you can see all the rings of the wood) uses significantly more oil than the other places, that is completely normal.
The best analogy for wood involves a bundle of straws. Simply put, wood and all its fibers are essentially just a bundle of straws and the end grain of the wood is the end of the straw. It is a lot easier for liquid to pass into the ends of a straw than the middle. As such, those areas will take more mineral oil to become saturated. You may need to add more oil to the board or your spreading implement of choice as you carry on. The goal is to have little lines and areas of excess oil on the board once you are done. Once you’ve covered the entire board in oil, allow it to sit for a few minutes in such a way that all the sides have access to open air. Once it has sat for a little bit, take a fresh cloth or paper towel and wipe off the excess. Congrats, you’ve refinished your board!
If you purchased a wonderful wood cutting board from Gia Woodworking and don’t feel like refinishing it yourself, reach out to us and we can help you out!
Dealing with Knife Marks
Now time to cover the other thing you’ve probably noticed if you’ve had your board for a while now: those pesky knife marks. The good news is, they can be easily dealt with before you do your refinishing work!
Sanding is your best friend in this situation, and a random orbital sander will make the job much easier. If you have multiple boards and like to keep them in tip top shape, I believe the sander would be worth the investment. A cheaper corded one from your local hardware store would suffice, but if you’re into online shopping here’s a link that may interest you: https://amzn.to/4spELZp
For those of you fluent with tool brands, Black and Decker may seem like a brand you joke about and don’t use. However, for the purposes of refinishing cutting boards a few times a year, it will hold up. If you aren’t a fan of Black and Decker and want something a little bit nicer, I quite liked and have personally used this corded DeWalt one: https://amzn.to/47lmwvL
Now that we have that settled, we must discuss sandpaper. It’s time for a quick crash course on grit. Grit is the number that determines how rough a particular sandpaper is. The higher the grit number, the finer the sandpaper. The grit number measures the number of abrasive grains within a square inch. The more the abrasive grains that fit in a square inch, the smaller they are and the less wood they remove as they pass. Grits are usually thrown into three categories: Stock removal, surface preparation, and surface finishing. Let’s discuss these categories a little further before we continue.
Stock removal (0-80 Grit): Hypothetically this category should actually be 1-80 as 0 grit would be blank paper in theory. Should I change it? Yes. Will I? Maybe later. These grits are used for, believe it or not, stock removal. These grits specialize in removing small layers of the wood you are sanding. The finish they leave is very rough, which is why we need the other two categories.
Surface Preparation (100-120 Grit): Some people may choose to include 150 grit sandpaper in this category. Are they wrong for doing so? I’ll be honest, I don’t know. I believe that 150 grit could fit here or in surface finishing depending on the case and for this article, I am just going with what the sandpaper brand Diablo says. They are not a sponsor but they make the best sandpaper around in my opinion. These grits are used to bridge the gap between your stock removal and your finish work. How? I’m glad you asked. The lower grit sandpaper for stock removal has very large abrasive grains as we discussed earlier, which means they tend to cut a little deeper into the surface you are sanding. Due to how small the abrasive grains are on the finish grits, you would be doing many passes to try to get the whole board down to the elevation of your deepest cuts. These intermediate grits help bridge the gap between the two and will save you many passes.
Surface Finishing (180-220): You may be asking yourself, why does this category end at 220 if it’s the last category? Shouldn’t it go to infinity? Well, I left out a secret fourth category: Polishing. Sandpaper is used for more than just wood products and as such, not all sandpaper is suitable for use with wood. If you use sandpaper with a higher grit than 220, chances are the little particles of wood that come off your board will be so small that they will clog the pores within the wood that usually soak up your finish.
I usually buy the packs that have multiple different grits in them, since I tend to use them all up at similar rates. If you happen to be at your local hardware store, they likely have the Diablo sanding disc packs there, but if you’re into the whole online shopping thing, here’s a link for a pack that 3M makes: https://amzn.to/4lJUj81
Anyways, back to our cutting boards. For the purpose of refinishing a cutting board, we will need nothing rougher than 80 grit. This should be the grit you use for your first pass. A little tip: only pass over the faces of the cutting boards on this pass. With the sandpaper being this abrasive, you run a very real chance of ruining the bevel on the edges of your cutting board if you also try to sand the edges. The primary focus is taking out the knife marks so, there’s no real need for stock removal on the edges anyways. I recommend either sanding the edges by hand with 180 grit sandpaper or just hitting them on your last pass with 180 on your sander, being careful to keep the board and the sander completely perpendicular to one another. You should always keep your sander perpendicular to the face you are sanding to avoid divots or damaged edges.
It is important to note that you should aim to pass over everywhere on the cutting board an even number of times. This keeps you from accidentally sanding one area lower than the others. I recommend watching a tutorial on sanding if you haven’t done it before just to get the basics down. Since I believe it is better to watch instead of reading about it, here’s a YouTube video I think is a good watch:
Once you’ve sanded down far enough that the knife marks are no more, it is time for a new grit of sandpaper. It is important to note that as you move from grit to grit, the number should keep getting higher and higher as this will smooth out your board. In my experience, you should try to keep your jumps in grit to 60 or less, as any bigger jump and you will be spending more time to obtain the same results (the higher grit will take many more passes to get down to the low points in your lower grit sanding passes as we previously discussed). A nice progression for our purposes would be 80-120-150-180. If you have many boards that you are refinishing, feel free to play around with your jumps a bit; maybe 80-120-180 or 80-150-180 works better for you. With experiments comes experience.
Now you may have noticed something seems a little off. Why do the grit progressions listed stop at 180 and our surface finishing category from earlier stop at 220? The answer is quite simple. For mineral oil I suggest stopping at 180 grit. Both 180 and 220 provide nice smooth finishes with the difference between the two being fairly small, but still noticeable. So why not 220? Remember as you climb up in grits the particles become smaller and clog the pores in the wood. That can still happen to a lesser extent with 220 grit. Since mineral oil is type of finish that is absorbed by the wood (as opposed to a Varathane or wax that sits on the surface) we want to make sure that we keep as many pores as possible open for the oil.
Once you’ve progressed through all the grits up to 180, the sanding is complete. Or is it? Not quite. For best results there’s one last step. Take a spray bottle and give the entire board a light spray. Now sand it one more time with your 180 grit. The water forces some of the wood grain to stand on end. By wetting the wood then sanding again, the extra pieces are removed, making for a better finish. Here’s a great video on the process by Workshop Companion, one of my favourite YouTube Channels:
Now, the board is ready for finish! Once again, if you have purchased a board from us and want us to take care of refinishing it, contact us!
Gia thanks you for your time reading this article and as a reward, here is a picture of her.


Leave a comment